I remember the exact moment I gave up on ever making a decent loaf of bread. It was 2 AM, my kitchen looked like a flour bomb had detonated, and my sourdough starter—affectionately named “Brad”—had developed a suspicious green fuzz. I stared at the sticky, shapeless blob in my mixing bowl and thought, “This is it. I’m just not a bread person.”
Sound familiar? You’ve tried the artisan recipes, watched the YouTube tutorials, even bought the fancy Dutch oven. But somehow, your loaves always end up as dense doorstops or flat, sad frisbees. Let’s be honest: baking bread at home can feel like a cruel joke.
But here’s the shocking truth: the problem isn’t you. It’s the advice you’ve been following.
Most recipes tell you to knead for ten minutes, wait for a “windowpane” test, and babysit your dough like it’s a newborn. That’s nonsense. I’ve spent the last three years obsessively testing every hack, shortcut, and secret trick in the bread-baking world. And I’ve found that the perfect loaf comes from doing less, not more.
So grab a notebook—or just your phone—because I’m about to spill the 3 things you’re doing wrong that are ruining your bread. And the fix might be simpler than you think.

The “Knead to Death” Myth That’s Killing Your Gluten
Let’s address the elephant in the room: kneading. For decades, we’ve been told that bread requires aggressive, rhythmic pounding. You’ve probably seen those videos where someone slaps dough against a counter for ten minutes straight. It looks intense. It looks professional. It’s also completely unnecessary for most home bakers.
Here’s what most people miss: gluten development happens primarily through time, not force. When you mix flour and water and let it sit, enzymes naturally break down proteins and re-form them into gluten networks. It’s called autolyse, and it’s the single most underrated technique in bread baking.
I tested this side-by-side. One loaf I kneaded vigorously for 12 minutes. The other, I just mixed flour and water, covered it, and walked away for 30 minutes. The autolysed dough was silkier, easier to shape, and produced a loaf with better oven spring. The kneaded dough was tougher and denser.
So what’s the fix? Stop kneading like you’re in a Rocky montage. Instead, use the “stretch and fold” method. Every 30 minutes during bulk fermentation, gently stretch the dough and fold it over itself. Do this three or four times. That’s it. You’ll build strong gluten without the workout.
Pro tip: If your dough feels sticky and unmanageable, don’t add more flour. That’s a sign of underdeveloped gluten, not too much water. Just give it more time.

The Temperature Trap: Why Your Kitchen is Sabotaging Your Crust
Here’s a scenario: you follow the recipe perfectly, measure everything by weight, use the exact flour. But your loaf comes out pale, dense, with a crust that could double as a hockey puck. What gives?
The answer is temperature, temperature, temperature.
Your oven might say 450°F, but is it really? Most home ovens run 25-50°F cooler than the display shows. I learned this the hard way after a dozen pale, underbaked loaves. I bought a $15 oven thermometer and discovered my “450°F” oven was actually running at 390°F.
But it’s not just the oven. It’s the water temperature, the room temperature, even the temperature of your flour. Yeast is a diva—it thrives at 75-80°F. Too cold, and fermentation slows to a crawl. Too hot, and your yeast dies before it can do its job.
The fix? Get a cheap digital thermometer. Measure your water temperature before mixing (aim for 80-85°F). If your kitchen is cold (below 70°F), use the oven with the light on as a proofing box. And preheat your Dutch oven for a full 45 minutes before baking. That thermal mass creates the steam you need for that crackling crust.
Here’s the secret most bakeries won’t tell you: They don’t rely on steam injection. They use a combination of high heat and a covered vessel to trap moisture. If you don’t have a Dutch oven, use a heavy stainless steel pot with a lid. It works just as well.
The Hydration Lie: Stop Being Afraid of Wet Dough
I’ll never forget the first time I made a 80% hydration dough. It looked like pancake batter. I panicked, added more flour, and ended up with a brick. The truth is, wet dough is your friend.
High hydration (70-80% water to flour ratio) creates those beautiful, irregular crumb structures—the big holes that make artisan bread look so impressive. But most home bakers are terrified of sticky dough. They add flour until the dough feels “right,” killing the very texture they’re trying to achieve.
Here’s the reality check: wet dough is supposed to be sticky. It’s not a sign of failure; it’s a sign you’re on the right track. The key is proper technique, not more flour.
Try this: use a bench scraper to handle wet dough. Lightly oil your hands instead of flouring them. And most importantly, give the dough time to hydrate. A stiff dough after mixing will often become silky and manageable after a 20-minute rest.
My go-to ratio: For every 500g of bread flour, use 375g of water (75% hydration). Add 10g salt and 2g instant yeast. Mix, rest 30 minutes, then do three stretch-and-folds over 1.5 hours. Shape, proof, and bake. It’s almost foolproof.
The Proofing Paradox: Why Your Dough is Overproofed (And You Didn’t Even Know It)
You’ve probably heard that underproofed dough makes dense bread. True. But overproofed dough is the silent killer of home baking. And it’s way more common.
Here’s what happens: your dough looks beautiful after a few hours. It’s puffy, jiggly, and has doubled in size. You get excited. You let it go another hour “just to be safe.” By the time it hits the oven, the gluten structure has collapsed. Your loaf spreads sideways instead of rising up. The crumb is dense and gummy.
The fix is the poke test. Lightly flour your finger and gently poke the dough. If the indentation springs back slowly and leaves a small dimple, it’s ready. If it springs back immediately, it needs more time. If it doesn’t spring back at all—you’ve overproofed it.
For beginners, I recommend underproofing slightly rather than overproofing. A slightly underproofed loaf will still have decent oven spring. An overproofed one is a lost cause. You can always save a slightly underproofed loaf by extending the final proof by 20 minutes. But there’s no fixing a collapsed dough.
Cold proofing is your secret weapon. After shaping, put your dough in the fridge overnight. This slows fermentation, develops flavor, and makes scoring easier. Plus, cold dough holds its shape better when it hits the hot oven. I’ve been doing this for two years, and it’s the single biggest improvement I’ve made.
The Salt and Yeast Dance: A Chemistry Lesson You Actually Need
Most people treat salt and yeast like they’re in a bad marriage—they just throw them in together and hope for the best. That’s a mistake.
Salt inhibits yeast activity. If you mix salt directly with yeast, you can kill the yeast or significantly slow fermentation. The pro move? Mix your flour and water first, let it rest for 20 minutes, then add salt and yeast separately on opposite sides of the dough. Or better yet, dissolve the salt in a little water and fold it in during your first stretch-and-fold.
Another hidden killer: expired yeast. I’ve made bread with yeast that was “technically” still within its expiration date. The loaf was flat and tasteless. Test your yeast before using: mix a teaspoon of yeast with warm water and a pinch of sugar. If it doesn’t foam within 10 minutes, toss it.
Fresh yeast vs. instant yeast: Instant yeast (like SAF Red) is more forgiving and doesn’t need proofing. Active dry yeast requires dissolving in water first. I use instant yeast for everything because it’s less fussy and gives consistent results.
The Final Frontier: Baking Like You Mean It
You’ve done everything right. The dough is proofed, shaped, and scored. Now comes the moment of truth: baking.
Most people open the oven too early. The first 15 minutes are critical. That’s when oven spring happens—the rapid expansion of gases that gives your loaf its final shape. If you open the door, you let out steam and heat, and your loaf collapses.
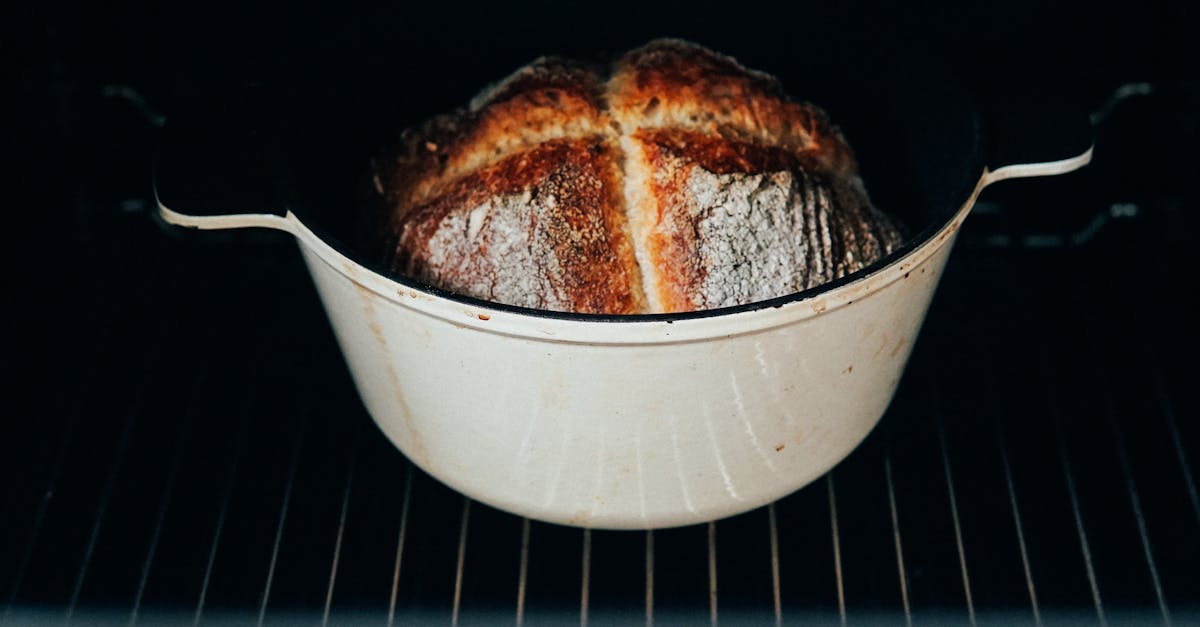
Here’s my exact baking routine: Preheat Dutch oven at 500°F for 45 minutes. Carefully transfer dough (cold from the fridge) onto parchment paper. Score with a sharp lame or razor blade. Lower into the hot pot, cover, and bake at 475°F for 25 minutes. Remove lid, reduce to 450°F, and bake another 15-20 minutes until deep golden brown.
The internal temperature test: An instant-read thermometer should read 200-210°F in the center. But honestly, I trust color more. A deep, caramelized crust means it’s done. Let it cool completely before slicing. I know it’s torture, but cutting into hot bread ruins the texture. The inside is still setting.
The Truth About “Perfect” Bread
Let me level with you: there is no perfect bread. Every loaf is a reflection of your environment, your ingredients, and your mood that day. Some will be ugly. Some will have a hole the size of your fist. That’s not failure—that’s character.
What I’ve learned is that the best bread comes from confidence, not perfection. When you stop obsessing over every gram and start trusting the process, your bread will improve dramatically. The 3 things you were doing wrong were: overworking the dough, ignoring temperature, and fearing hydration.
Now you know the fixes. So go make a mess. Kill a starter or two. Burn a loaf. It’s all part of the journey.
And when you pull that first perfect loaf out of the oven—golden, crackling, steamy—you’ll know it was worth every sticky disaster.
Now get baking. And send me a picture of your first loaf using the fixes above. I’ll post the best one on my feed.