
Let me tell you something about Mount Adaklu that most travel guides won't mention.
I’ve stood at the base of this towering rock formation in Ghana’s Volta Region, stared up at its jagged edges, and thought: This is not your average weekend hike. Mount Adaklu isn’t just a climb — it’s a full-body challenge, a cultural immersion, and a serious workout disguised as an adventure. If you’re into sports, fitness, or just pushing your limits, this mountain will humble you in the best way.
But here’s the thing: most people show up unprepared. They think it’s a casual stroll. Let me save you from that mistake. I’ve made it, learned from it, and now I’m here to share the real guide — the one that treats Mount Adaklu like the athletic endeavor it truly is.
Why Mount Adaklu Should Be on Every Sport Lover’s Bucket List
I’ve climbed a few mountains in my time — Kilimanjaro’s elephant trails, the steep switchbacks of Table Mountain — but Mount Adaklu is a different beast. It’s raw, untamed, and brutally beautiful. Standing at roughly 600 meters (about 1,970 feet) above sea level, it’s not the tallest peak in Ghana. But don’t let that fool you. The gradient is punishing. The terrain is mixed — loose gravel, exposed rock, and narrow ledges that demand focus.
What makes it a sports lover’s paradise? Three things:
- Cardio intensity — The ascent is steep and sustained. I clocked a heart rate of 165 bpm on the way up, and I’m not out of shape.
- Full-body engagement — Your legs burn from climbing, your core stabilizes on uneven ground, and your arms pull you up rock faces.
- Mental grit — The last 200 meters are a psychological battle. You’ll want to quit. That’s the point.
The Training You Actually Need (Spoiler: It’s Not Just Running)
Here’s what most people miss: Mount Adaklu demands specific preparation. I’ve seen experienced runners gas out after 15 minutes because they only trained on flat pavement. I’ve also seen weekend warriors with decent leg strength struggle because they neglected grip strength.
Let’s break down the real training requirements:
- Endurance: You need sustained effort for 45–60 minutes of climbing. I recommend stair climbing workouts — find a stadium or a tall building. Do 10–15 minutes of continuous stair steps, rest 2 minutes, repeat three times. This mimics the rhythm of the ascent.
- Balance and agility: The trail has loose rocks and roots. Single-leg exercises — like Bulgarian split squats or pistol squats — build the stability you need. I found that 3 sets of 10 reps per leg, twice a week, made a massive difference.
- Grip strength: You’ll grab rocks and tree roots for support. Farmer’s carries, dead hangs, and towel pull-ups are your friends. I’ve seen people slip because their hands gave out — don’t be that person.
- Mental preparation: This is the hidden variable. I practiced visualization — picturing myself at the summit, breathing steady, even when my thighs screamed. It sounds cheesy, but it works.
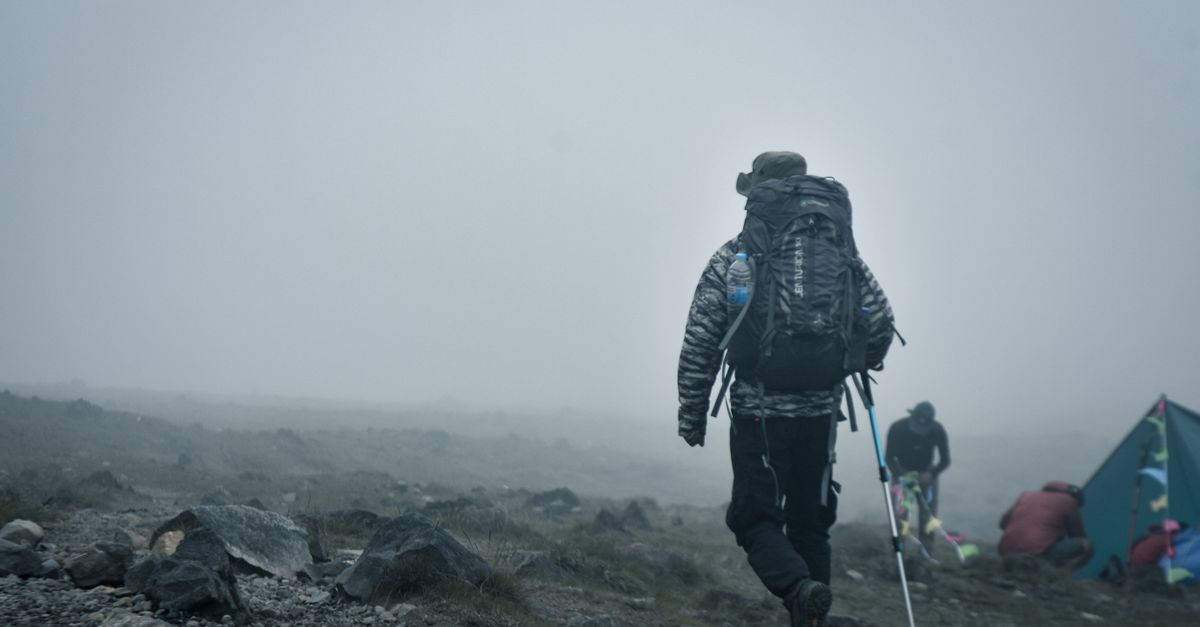
What to Wear and Pack (The Gear That Saves Your Knees)
Let’s be honest: you can climb Mount Adaklu in flip-flops. People do. But you’ll hate every second, and you’ll risk injury. I’m going to give you the essential gear list that turns a painful slog into a controlled, enjoyable athletic performance.
- Footwear: Trail runners with aggressive tread or lightweight hiking boots. I used a pair of Salomon Speedcross 5s — the grip on wet rock was a lifesaver. Avoid heavy boots; they’ll slow you down.
- Clothing: Moisture-wicking fabric. No cotton. It gets humid, and you’ll sweat buckets. I wore a lightweight long-sleeve shirt to protect against sun and scrapes.
- Pack: A 10–15 liter hydration vest or small backpack. You need hands free for climbing. I carried a 1.5-liter bladder with electrolyte tabs.
- Protection: Sunscreen (SPF 50+), a wide-brimmed hat, and sunglasses. The sun at this elevation is intense. Also, bring a small first-aid kit with blister patches and antiseptic wipes.
- Extras: Trekking poles (optional but helpful for descent), a headlamp (if you start early), and a waterproof phone case (sweat happens).
The Climb Itself: A Step-by-Step Breakdown
I’m going to walk you through the actual climb so you know exactly what to expect. No sugarcoating.
Start at the base village (Adaklu Waya). You’ll meet your guide — I recommend hiring a local. They know the safest routes and can share stories about the mountain’s cultural significance. The trail begins as a gentle incline through farmland. You’ll pass cassava fields and small huts. Enjoy this part; it’s the easiest.
Minutes 0–15: The gradient increases. You’re now on a dirt path with exposed roots. Your calves start burning. I remember thinking, This is fine, I’m just warming up. Don’t push too fast. Find a steady rhythm.
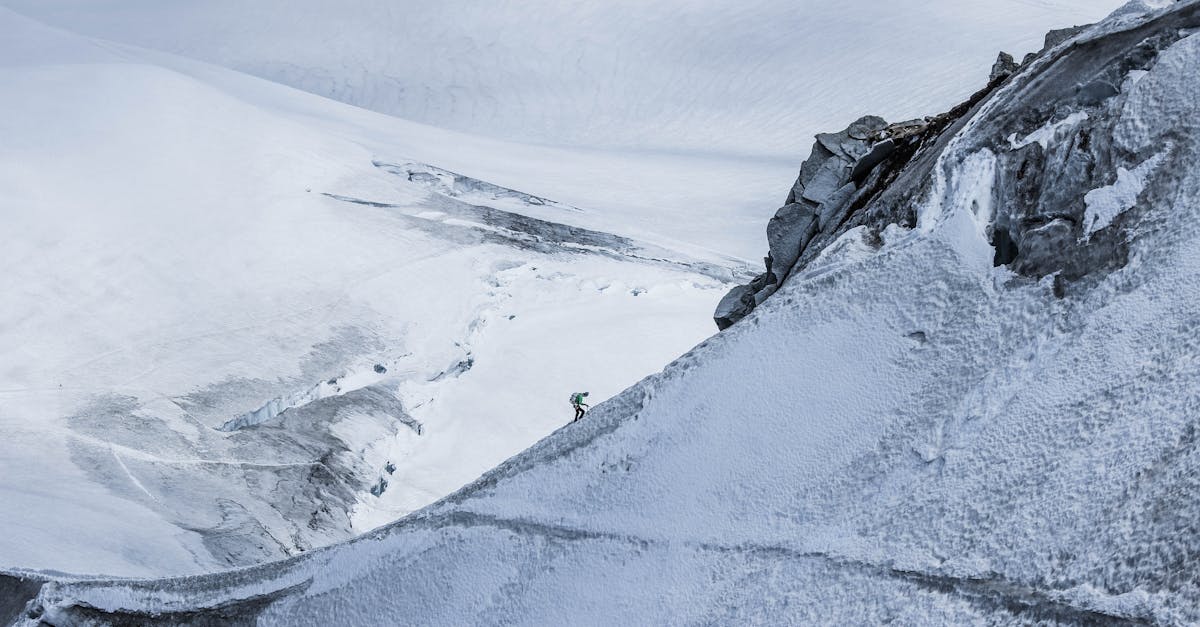
Minutes 15–30: This is where it gets real. The trail narrows and becomes rocky. You’ll scramble over boulders, using your hands. Keep three points of contact — two feet and one hand, or two hands and one foot. I slipped once on loose gravel; my guide caught my arm. Stay focused.
Minutes 30–40: The “false summit” section. You’ll see what looks like the top, but it’s not. This is the mental gut-check. I stopped here, drank water, and told myself, You didn’t come this far to give up. Most people quit here. Don’t be most people.
Minutes 40–50: The final push. The rock face is steep, and you’ll need to pull yourself up using fixed ropes or tree roots. Your arms will shake. Your lungs will burn. Breathe in for four counts, out for four counts. I used this rhythm to stay calm.
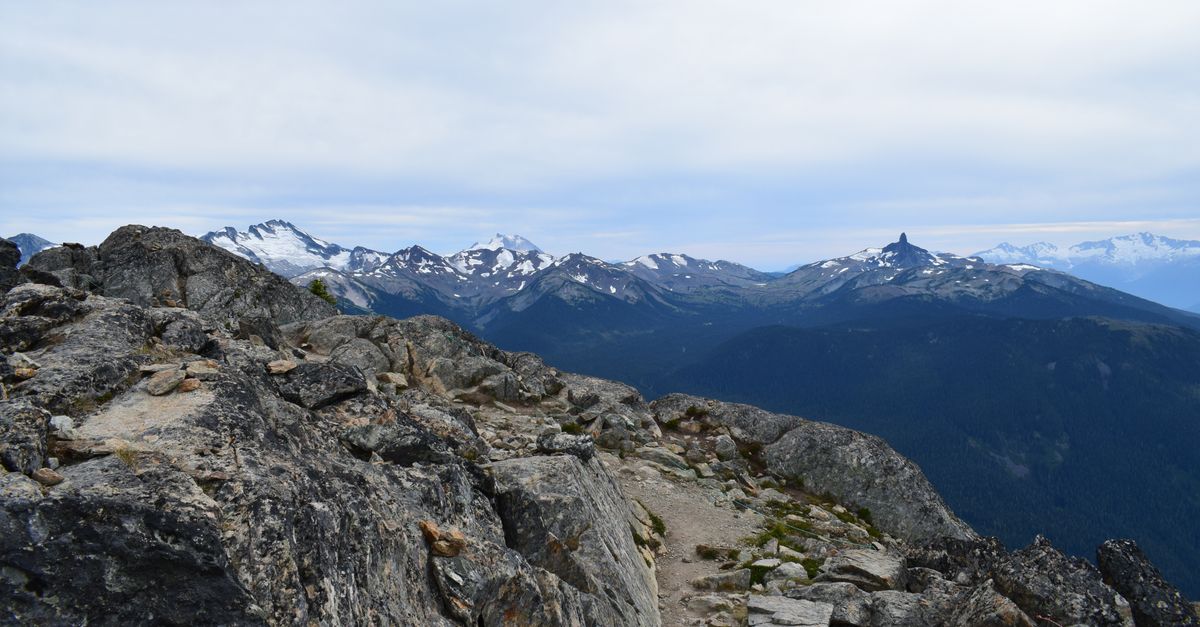
Summit at ~50–60 minutes: You made it. The wind hits you immediately. The view is staggering. I sat on a flat rock, ate a banana, and felt like I’d conquered the world. The descent takes about 30–40 minutes and is harder on the knees — go slow, use your glutes, and watch your footing.
The Secret No One Tells You About the Descent
Here’s the truth: the descent is more dangerous than the ascent. I’ve seen people get cocky on the way down and twist ankles or slide on loose gravel. Your legs are tired, your focus wanes, and the steep angle puts constant pressure on your knees.
My strategy: treat the descent like a separate workout. Engage your core, keep your knees slightly bent, and take small, deliberate steps. Use a side-step technique on steep sections — it distributes weight better. If you have trekking poles, use them. If not, grab tree branches for balance.
I also recommend doing eccentric quad exercises in training — like slow, controlled step-downs from a box. This builds the strength needed to absorb impact. Your knees will thank you.
Why This Mountain Changes How You See Fitness
I’ve been home for months, and I still think about that climb. Mount Adaklu isn’t just a destination — it’s a benchmark for your physical and mental limits. It taught me that fitness isn’t about how much you can lift in a gym or how fast you can run on a treadmill. It’s about how you adapt to real-world challenges: uneven terrain, unpredictable weather, and the voice in your head that says stop.
If you’re looking for a way to test yourself, to break out of the routine of indoor workouts and sterile gyms, this is it. Mount Adaklu will show you what you’re made of. And when you stand at the summit, looking out over a landscape that’s been there for millions of years, you’ll understand why the effort was worth it.
So here’s my call to action: book the trip. Train hard. Climb with respect. And when you reach the top, take a moment to breathe — not just because you’re out of oxygen, but because you’ve earned it.
Now go get your summit.